Acupressure Therapy : Acupressure Point for Headaches

"Wow, I really seem to be having this problem
with my head". Having problems with headaches? My name is Mark Brinson, Doctor of Oriental
Medicine, Physical Medicine Specialist and International Speaker. Headaches can sometimes
be a symptom of larger problems but if you're watching this now, I'm kind of assuming that
you're having generalized head pain or maybe specific patterns of pain that are going on
in the head. I'm going to give you a couple of acupressure points that can help with that.
I do want to mention also that many times a good massage or neuromuscular therapist,
specifically, can help with any type of headaches that you have that occur in regular patterns
or regular intervals throughout the day or the week. Some of the points that can help,
from an acupressure standpoint, specifically, one directly between the bony prominence underneath
the ear and the back of the head, there's a little spot between the muscles that you'll
find that's soft. This soft spot, pressing directly up and towards the center of the
skull, gallbladder twenty-one, is excellent for headaches of all sorts. You can use it
on one side or on both sides, stimulating for approximately one to two minutes at a
time. The second point that's really good for head pain, a common cold, busting the
immune system, is a point, LI4, that's directly between the web of the hand, pressing towards
the palm of the hand. As you press this what you're going to feel is a deep dull ache,
that's going to help with anything that has to do with facial pain, head or neck pain.
Now remember, headaches, if going on for several days, if they become severe, if they are accompanied
with nausea or especially if they're accompanied with fever, are something that may need to
be checked out by your health provider. My name is Doctor Mark Brinson, wishing you balance
in your life.

How to Relieve Back Pain | Reflexology

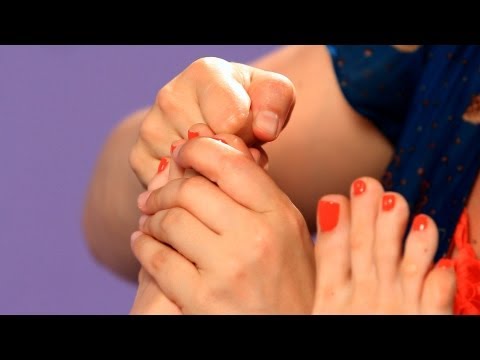
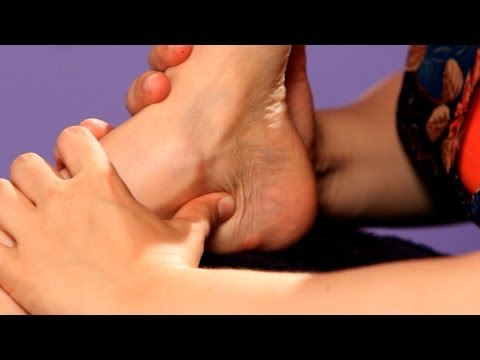
so if you want to use foot reflexology for back pain you're going to want to focus on the spinal reflexes so we'll start there so you actually don't have to move the other foot up but just for our purposes you could see this this medial aspect really well we'll just move it aside usually the person can just sit with both their feet in front of you so the spinal reflex is just from here all the way down this side of the foot so we're going to start at the base and we're going to work our way all the way up depending on where the pain is in the back you might want to stop and give a little more attention to either where you're feeling a little change in that tissue texture or if they've indicated they have a lot of pain around their cervical area where their mid-back or their lower back and you'll just either stay there a little longer or you can work that area from from different vantage points so here we're just doing thumb walking taking little bites all the way up this medial aspect of the foot right up here we're getting into the cervical spine reflex and actually go all the way up I'll go past the very top and into what are the brain reflexes which is on the great toe if you really want to give a lot of focus to that area you could start at the top and then go back down again there's certainly no reason why you can't do that a couple times and if you also want to like I was saying if someone's having mid-back pain you can give a little more attention to the mid area you could actually using your thumb or your fingers you could do a little walking across the reflex point go there and then maybe move down and go across again you'll want to do that bilaterally so you'll want to do both feet you do the other side you could also give some attention to the the legs and the lower legs and so it'll be right this is the fifth metatarsal here this is the base this is a calcaneus and heel bone and right in between there is the the knee and hip reflex I'll actually course back through here to some of the hip reflexes it could be really intense you'll want to check in with your person if they start to pull away definitely ease up we could do a little bit of finger walking in there right and then the last point will just be a solar plexus hold so with your thumbs at the diaphragm line we'll come across through here find the point you just lean forward into there and that's it that'll be the protocol for if somebody's experiencing some kind of back pain anywhere along their spine

Acupressure for Migraine Headache – Massage Monday #378

Hi everyone. I am Yasuko and it's time for Massage Monday. My dear friend is suffering from migraines
so this week I'm going to share acupressure points for migraine. Migraine is a severe case of headache and
often comes on one side of the head and accompanied by blurred vision, pounding sensation, nausea,
and physical movement makes it worse. Press these points for one minute as you breathe
deeply. The first one is on your hand. If you are pregnant do not press this point
until after the due date because it can cause labor. You can press all the other ones in this video. Close your thumb and index finger. It's at the end of the crease. This is called Large Intestine 4 or LI 4. Press this point towards the index finger
bone. This point is good for any kind of pain because
it produces endorphins also known as a natural painkiller hormone. The next one is in the corner of the forehead
where the forehead and hairline meet. This is called Stomach 8 or ST 8. Some instructions say half the thumb width
from the hairline. To be exact it's 4.5 thumb widths or 4.5 cuns
from the center where the nose line and the hairline meet. You can also use four fingers which is the
same as 3 thumbs or 3 cuns and two fingers which is the same as 1.5 thumb or 1.5 cun. I think it's simpler to imagine you have a
straight hairline across and down and it's in the corner. Find the depression in the center at the base
of the skull. Move to the side and go over the big ropy
muscle which is trapezius and there is a depression. These are called GB 20 or Gall Bladder 20. You can press or circle to stimulate these
points using hooked thumbs, fingertips, overlapped fingertips, or with free thumbs by weaving
fingers. The last one is on the top of the foot. Go up the valley between the pinky and 4th
toe and it's where the finger stops. This is called Gallbladder 41 or GB 41. If you have a hard time reaching your foot,
use a tool such as a pencil eraser to press these points. I hope this is helpful. Thanks for watching. I'll see you back next week. Make it a great week. Feel free to comment below and please don't
forget to subscribe.

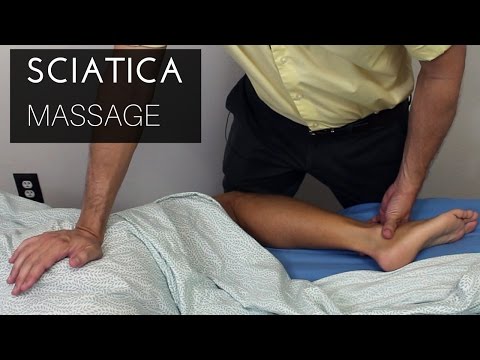
Massage Tutorial: Sciatica myofascial release techniques

Hi everyone. I'm Ian Harvey, massage therapist. This is my friend Steve, and today we're going
to be talking about the sciatic nerve and sciatica pain. First let's start by talking about what sciatica
pain is, then we're going to talk about the general anatomy of the pelvis and sciatic
nerve, and then we'll do a nice massage demonstration with my basic protocol. If you'd like to skip ahead you can click
on the time codes down in the description. So sciatica is pain in the buttock and the
low back and that sometimes travels down the leg, and the part that travels can feel like
a burning, it can feel like a stabbing pain, it can even be a numbness. The sciatic nerve itself is a mixed nerve. It's both a motor and a sensory nerve so it
can also be involved in weakness. The sciatic nerve originates from L4 through
S3. So L4, L5, and this is around S1, S2, S3. Just to note you can't interact directly with
the spinal nerves by pressing next to the spine here. The spinal nerves come out anteriorally, so
forward, and then they exit out posteriorally through the greater sciatic foramen along
with piriformis. That's one reason why piriformis can be considered
important here. First let's talk about some relevant landmarks. Find the iliac crest, you can come up over
that and press down toward it so you can define the border of that iliac crest. Inferior to that iliac crest you're going
to feel a knob of bone. This is the greater trochanter and this is
important when we're talking about the sciatic nerve. You'll know that you're on the greater trochanter
when you can pinch it from either side and rock it like that or you can just palpate
for it, and then rock the leg and you'll be able to feel this greater trochanter move
under your fingertips. Next we want to find the ischial tuberosity. If you use a broad hand and press upward on
the gluteal region you'll feel a bone that stops you from moving further up. If you've never felt this on a client before,
then sit in a chair and feel for the bone that presses against the chair and that is
the ischial tuberosity. Something else I'd like you to palpate is
something that runs between the ischial tuberosity and the SI joint, so find the sacrum. It's a triangular piece of bone at the posterior
of the pelvis. It is the bottom-most section of the spine
other than the coccyx. Feel for that triangle, and this border of
the triangle represents the SI joint. This is where the sacrum and the ilium come
together, the sacroiliac joint. And palpate the ischial tuberosity. Between the two of those you're going to feel
a very tight band of something. This is the sacrotuberous ligament. If you've been palpating around this area
and you feel a tight band running between the ischial tuberosity and the SI joint, that's
not a knot. That's not the sciatic nerve. That's not one of the rotators that needs
to be worked out. That is a ligament and it is supposed to be
there. Next I'd like you to palpate for the PSIS,
that's a knob of bone up at the top of this V here. It's at the top of that SI joint and between
that and the coccyx, that's where the piriformis runs and it's also where the sciatic nerve
emerges. The sciatic nerve is anterior to that piriformis
muscle in most people and you're not going to be able to directly palpate it here. In fact, you might not be able to directly
palpate piriformis either, and we're actually not going to be worrying too much about individual
rotator muscles here. We're going to be coming at this from a myofascial
perspective, and so we're not going to be focusing on this muscle or this muscle, etc.,
but this is where it emerges and then the sciatic nerve runs here. It's between the greater trochanter and the
ischial tuberosity, so this is where the sciatic nerve runs and just realize that as this tissue
becomes thinner between these two landmarks here, this is a point where it's possible
to accidentally put too much pressure directly on that sciatic nerve. A little bit less so as you travel up superiorally. Now, I like to approach the hips from superior
to inferior and from inferior to superior, so during a typical session where I'm working
with sciatic pain I will be working with it twice, and each will feel slightly different
to the client and will offer a slightly different stimulus. Hopefully between the two of them I'll have
worked that area thoroughly. I'll just be working with the back and then
I will undrape the hip. To undrape this hip I press here at the sacrum,
I fold away, and if I need more real estate I will press here at the upper hip and then
bunch away. When I'm working with my sciatica clients
I find that they often have a lot of touch sensitivity here in this hip region and sometimes
in the low back. I don't like to come at this from a 90 degree
angle where I'm pressing straight down toward those sensitive structures. Instead I take a step back and I'm working
at this from a 45 degree angle which I think of as the myofascial angle. We're taking all of this tissue and we're
pressing it along forward. We're giving it some traction inferiorally. I start with some broad contacts
and I move very slowly. If you've got a client in your office who
has sciatica-type symptoms, it's a good idea to talk to them about how you would like to
proceed and that it might involve direct contact with their hip region. Point out exactly what you mean on your own
body, reassure your client that they'll always be well draped and you can always offer the
alternative that if you choose to leave your underwear on I may ask you to move it around
a bit. A lot of these long flowing strokes from way
high up to way low down aren't going to be as possible but you can always interrupt this
stroke and start again. But when possible when working on things from
a myofascial perspective I like to work from origin to insertion and beyond. I'm not thinking about any individual muscle. I'm thinking about the fascia. I'm thinking about this thoracolumbar fascia. I'm thinking about how it interacts with the
hips. I'm thinking about how the hips interact with
the hamstrings and I'm starting far up and ending far down, far past where any of the
relevant muscles might begin or end. So with each of these strokes I am including
and acknowledging those deep rotators like piriformis and quadratus femoris. I'm just not attacking them directly and in
fact I find that that can often be counterproductive. Pressing in directly can often provoke a guarding
response from those muscles, causing them to try to protect the surrounding structures. They recruit their friends and before you
know it the entire region is difficult to work with because it's hypersensitive or because
there's spasm. Start this massage by acclimating your client's
body and their nervous system to your touch. Err on the side of using too little pressure
and going too slow. As you work with these hips, don't forget
about the three dimensionality of the body. We don't want to just work with the posterior
pelvis. We want to work with the lateral pelvis as
well. I'm steamrolling right over that greater trochanter
as if it weren't there because I'm at this angle, I'm just able to grab this tissue and
traction it down inferiorally. Now you can introduce your fists here. I'm getting over my fists and using my body
weight to drag this tissue down. I'm thinking of moving that tissue down toward
his feet or down toward his greater trochanter rather than pressing directly down toward
the pelvis, so still using that myofascial angle for the pressure. To continue acknowledging that three dimensionality
of the body we can use one fist going from the SI joint down toward the greater trochanter
and we're using very broad surfaces here. This dorsal surface of these phalanges rather
than just these metacarpophalangeal joints. So not just these knuckles, but also these
surfaces as well. And the other hand can just be a nice palm
on the other side of the body tractioning that thoracolumbar fascia in the other direction. Try to limit the amount of time that you spend
in sensitive hips to about 10 minutes especially that first session. See how they feel afterwards. If they have excessive soreness that means
you did too much. If they just have a little bit of soreness
that's alright as long as it didn't provoke any sort of adverse reaction. From there you can try to increase your pressure
over time. It's very likely that their sensitivity will
decrease over time. I also like to approach the hips from inferior
to superior. This is just a different stimulus for the
nervous system. It deforms the tissue in a different way and
coming at this from a myofascial perspective, I'm not trying to change any individual muscle. I'm not going to be attacking this piriformis
or this quadratus femoris or any of the gemelli, etc. I just want to provide a lot of different
stimuli that are safe and comfortable to these sensitive tissues and let the body figure
out what to do with those stimuli. Medically speaking, a lot of cases of sciatica
are considered to be from compression due to disc problems and that's very possible
but what we can do as massage therapists is work with the related soft tissue. We can work with all the muscles that might
be irritated or in spasm and we can work with the hypersensitivity that tends to come with
any of this nerve pain. So we may not be able to work directly with
a disc but I've seen some great results just from working with all of the soft tissue descending
down from that area. So right now I'm just again passing, just
steamrolling over all of these areas and ignoring greater trochanter, ignoring the ischial tuberosity,
making sure to be thorough in my contacts so right now I am passing over the ischial
tuberosity. I can feel the greater trochanter on the thumb
side of my hand but I'm not putting pressure directly on any of these. In fact my pressure is directed this way. By the way, I've got my body braced against
the table. My rear leg is resting against the table. I am giving him my body weight so I'm never
having to use my back muscles to keep myself up. This is a very comfortable massage for me
because I'm just leaning. Once again remember the three dimensionality
of the body, work with this lateral hip tissue coming up from the IT band, passing over that
greater trochanter and working up into the lateral pelvis. While it might not seem like this lateral
pelvis is involved in sciatica-type symptoms, I find tightness here in pretty much 100%
of my clients with sciatica symptoms. It's all involved. It's all connected fascially and some of these
rotators can actually get co-mingled with gluteus medius and minimus including piriformis. Again, working from origin to insertion and
beyond, so working up into the low back just a bit. Here you can use fists as well especially
as your client's hips becomes less sensitized or you can choose to use this just with little
pressure. If you'd like to use fists without sinking
in too much, just keep your fists close to your body instead of letting them get away
from you. Keep your body connected to the table and
don't lean into it too much. Support yourself in other ways and make this
nice and broad. This shouldn't be knuckles sinking into sensitive
hip tissue. It should just be another form of that steamroller. As I steamroll past this SI joint, I am making
a bit of contact with all of these deep rotators through gluteus maximus and while I'm not
specifically working with any of them, they're all getting some deformation. They're all getting some stimulus and hopefully
it's comfortable stimulus that lets them know that they don't need so much tone and that
they don't need so much sensitivity. So far we've just been working with these
hip rotators transversely. We can also work with them longitudinally,
working out from this SI joint toward this greater trochanter. Just realize that as you do so you should
originate from the SI joint rather than from further down because that can pull things
apart. That's uncomfortable, so get your body weight
over this pressure and drag toward yourself. This is going to be a nice 45 degree angle
down toward your greater trochanter. You can come at this from different angles
starting a little higher, starting a little lower. Just realize that the greater trochanter itself
might be a little sensitive. That's the insertion site for all of those
rotators and if any of them is sensitive, if any of them is acting up, that can be felt
down here. You can also work up from the greater trochanter. Again we're going to start before this insertion
site so we're going to start distal to it. When you're doing this, you can use the other
hand to introduce gentle rotation and I'm not really digging in with my fingers here. I'm just using them as part of my steamrolling
technique. They're kind of breaking the ice in front
of my actual hand tool here which is just the palmar surface of my hand. Notice that I'm tucking my elbow into my hip
here and allowing my hip to drive this move. I'm not just pressing really, really hard
with my pecs and with my triceps. When you want to, you can step back and let
your body weight do this using straight limbs. Now as sessions pass and this becomes less
sensitive you might be able to do more with mobilization. You might be able to do some of this on your
first session but I do recommend being conservative as you work with people who have quite a bit
of pain here. A good way of mobilizing this hip is to re-cover
the hip as we're going to do some movement here. Prop the ankle up, bring the knee into a 90
degree flexion here and we're going to press in toward the SI joint as we allow this leg
to drop back. Press in as the leg drops outward. This is bringing into internal rotation so
we're stretching these external rotators as we're pinning them down toward the pelvis. We're up and down the pelvis as you do this. You can work up into that lateral pelvis once
again and down toward the greater trochanter. You can bring the hip into external rotation. I like to start by moving the knee outward
just a bit and then dropping this down toward the table, again pressing toward that SI joint
up into the lateral pelvis and coming down toward the ischial tuberosity. The greater trochanter is going to be in your
way here so just come to the inside of that. You can play with going in and out of that. This might not work for all of your clients
but you can grab the inside of their knee, bring them in further into external rotation
as you bring this knee outward so we're coming up into abduction. Then you can press the knee in toward the
hips so we're pressing the head of the femur here into the acetabulum and that can relieve
some spasm. That can be a comforting feeling and again
doing gentle compressions all around that greater trochanter up toward the SI joint. Working with the hip in a lot of different
ways with the tissues in a lot of different configurations can send a variety of stimuli
to the nervous system and let it know that it doesn't need all of that sensitivity. Just as a final word, don't forget to work
with the hamstrings. Don't forget about the hip flexors. Don't forget about the three dimensionality
of the body. If your clients have symptoms that are persistent
or recurrent or that are getting worse, please do refer them to their general practitioner
but I find that if people are just having these hip, low back, leg symptoms, that we
can safely work with this entire region without causing further pain.
Acupressure Therapy : How to Use Acupressure Points for Migraine Headaches

So with difficulty with migraines. Well, I
really feel for you, those could be extremely severe. My name is Mark Brinson, Doctor of
Oriental Medicine, Physical Medicine Specialist and Pain and Injury Rehabilitation Specialist.
Migraines, I want to make sure that you determine whether you have a migraine or not by listing
of this. Migraines are characterized not only by the severity of the pain, but really you
have other symptoms that go with it. So you might have some nausea, you might have some
balance problems, you might have a little bit of fear of lights or loud noises. Essentially,
this is almost like a whole body headache and they can be quite severe. Migraines are
typically cause by an occlusion or cutting off some of the deepest circulation of the
brain. You got two very small arteries that run up to either side of the vertebrae that
account for only twenty percent of the brain's circulation but it's the most important twenty
percent. So getting those neck muscles as relax as you possibly can is really important.
Also, seeing somebody that specializes like a Neuromuscular Therapist or a Physical Therapist
and working not only the muscles of the neck and tractioning the cervical spine as well,
but also specifically working the first three vertebrae can be very, very important. Now
with migraines there's a few Acupuncture points that you can also use that are quite helpful.
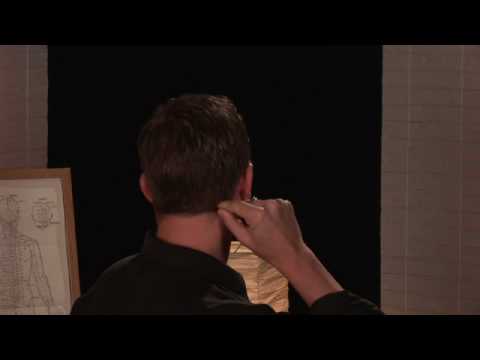
One is located between the bony prominence just underneath the ear and the very back
of the skull, right in between. You're going to notice that the base of the skull, there's
a nice little depth that your finger can sink into. Using this on both sides, going directly
towards the center of the brain can be extremely helpful. Very gently, pressing Du 20, immediately
on the top of the head where the sutras meet can be helpful as well. And using the most
powerful point, for pain of all sorts, especially pain in the head, Li 4 can be really helpful
as well. It's found right in the web of the hand, pressing towards the center of the palm.
You can use each of these in thirty second cycles up to three to five minutes and that
should help reduce some of your pain. But remember, seeking a qualified health professional
to help you with migraines can be very important and you don't have to live them. None of these
issues can be resolve very quickly. My name is Mark Brinson, Doctor of Oriental Medicine,
wishing you a balance and happy day.

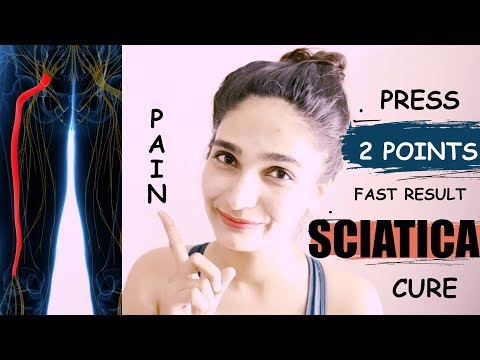
Sciatica pain natural treatment (FAST) | Acupressure cure | Samaya yoga

Welcome All. I am Jyoti Khatri, Health and
Holistic Wellness expert. In this video I am going to share 2 super effective
acupressure point that will help relieve sciatica pain fast and naturally. Sciatic nerve is
the thickest nerve in our body, which begins in the pelvic, run through the hip region,
to the back of the thigh and ends at the back of the knee joint.
Pain in the pathway of the sciatic nerve or its component nerve root is known as sciatica.
This video is going to be extremely useful for you if you have tenderness in the pathway
of the sciatic nerve, experiencing pain while raising the leg, feeling pain radiating from
back to the back side of the thighs and leg. Also, if you feel muscle power of the legs
is reduced or experiencing numbness of the foot. If, you are new to my channel then subscribe
NOW, to discover natural healing ways to live long and healthy life. Also,
press the bell icon to get notified whenever I will upload the video.
Now, lets get started. The first acupressure point helps to relax
the sinews, beneficial for calf, heel and relieving radiating sciatica pain. It is located
in the middle of back of the lower leg, half way between the crease at the back of the
knee and the ankle. You will find a depression between the heads of the gastrocnemius muscle.
Press the tender point in that depression or hollow firmly for 2 to 3 minutes or till
you feel energy is moving. Then repeat on other leg. By stimulating this point one can
feel relief in the pain and stiffness of the lumber lower back, sciatica, difficulty sitting
and standing, inability to stand for long, cramps, weakness of the leg, pain of the heel
and more. Along with treatment of sciatica, it is extremely useful point for the treatment
of the swollen, painful or bleeding haemorrhoids Next acupressure point is good for any problems
related to tendons and ligaments. It will help to remove muscle stiffness, tightness
in the joints and the tendons. Improving strength, flexibility, and mobility of the body. Along
with sciatica treatment, it is also useful in relieving spasm, cramps, especially along
the gall bladder pathway i.e head, neck, shoulder, sides of ribcage, hips and sides of the leg.
To stimulate the second point, treat your left side first and then the right. The second
acupressure point is located below the outside of the knee in a depression or hollow below
and in front to the head of the fibula. You simply slide your finger up the side of your
leg, until you find prominence below the knee. You will find a tender spot in the depression
where the fibula meets the tibia. Press and hold the point for 2 -3 minutes or till you
feel the energy moving. Then switch to your right leg.
On emotional level stimulating this point will help to move stagnant emotions including
depression, frustration, irritability, anger and confusion.
You can press these points 2 to 3 times a day.
I hope you find this video useful. Hit the like button below and share it with everyone
who might get benefit from watching this video. Also, write in comment down below the topics
you want to see in the future videos or the health problems you are dealing with right
now. I will cover those topics in the upcoming videos. Subscribe the Samaya yoga youtube
channel to get natural health related videos. I will see you in the next video

How to Cure a Headache with Acupressure

how to cure a headache with acupressure instead of reaching for a pain pill massage away a headache using acupressure the traditional Chinese curative technique of applying pressure to certain points of the body you will need two hands if you feel cold when using acupressure stop immediately pregnant women should not use acupressure step one using your index and middle fingers apply pressure to the muscles by your temples an area that holds a lot of tension keep up the pressure on this point and the following ones for 1 to 2 minutes pinpoint the correct spot by clenching and unclenching your jaw and feeling for throbbing step 2 move on to your ears using your thumbs massage the area underneath the large bones behind your ears using a circular motion this corresponds to G b20 an acupressure point that can relieve many kinds of headaches step 3 pinch the skin on the bridge of your nose between your eyebrows an area known as the third eye point and press it upward step 4 and finish up by squeezing the fleshy web of skin on the back of your hand between your thumb and index finger with the thumb and index finger of the other hand this connects to the acupressure point li for massaging it is particularly effective on sinus headaches do both hands step 5 congratulate yourself for getting rid of your headache without the aid of modern medicine did you know the average pharmacist offers advice to about 19 customers a week on over-the-counter headache remedies

5 Pressure Points for Pain Relief – Ask Doctor Jo

oh hey everybody it's Doctor Jo and Princess
Remy, and today I'm going to show you five pressure point relief spots. so
let's get started. so pressure points don't always work for everybody, but it's a really good easy thing to try
and it does work sometimes. if you've got some stress, a lot of times these help
with headaches, so depending on if you're stressed, if you're anxious, or maybe
you've got some headaches, or just new kind of stress in your neck here, these are
really good to try cuz again, they're quick, they're easy. it might not work for
you, but I think it's worth trying. a couple of them have really worked for me.
so each hold do you want to hold it for about five to ten seconds. and with
pressure points you want to put a good amount of pressure in there. sometimes
with some acupressure points and stuff you're just placing your hand on this,
but this is actually a pressure point where you want to put some pressure on
there. so the first one is over your clavicle area. so you can either do this
on the clavicle bones, some people like that pressure point, or slightly below it.
I like to do it slightly below it because I feel like pressure points do
well on muscle areas, and so you've got a little bit of your muscles right down
below that clavicle right there or that collarbone. so you can try it on the bone,
but I like it better just underneath because there's just a little kind of
groove that you can fit your fingers there. and so I'm pushing into that area.
I'm putting some pressure where it's slightly uncomfortable. it's not painful,
but I can definitely feel the pressure point there. so really again just pushing
five to ten seconds, maybe if you're in a clinic having a therapist do it for you
they might do it a little bit longer, but just starting off you probably just want
to do that five to ten seconds. you can do it a couple times. you can switch and
then do it on the other side. so again there's my clavicle or my collarbone
kind of in the middle of it this it sits here kind of coming in the middle that
little groove and just putting that pressure in through there. if you happen
to feel some numbness or tingling in your hands, if it's strong you might just
be pushing on some nerves through there, so you might want to slightly adjust
because you don't want to irritate the nerves. you really want this to be in the
muscle kind of area and again that five to ten
seconds. so the next one I've used this several times for headaches. so not
migraines, but just maybe like a tension headache or sometimes a dehydration
headache. you want to come down to where your thumb and your pointer finger meet
kind of in this little meaty area in between there's a muscle here a big
thick muscle called your thenar muscle, and you're kind of pushing in there and
in here. so you can see on each side almost like I'm pinching that area but
don't just get the skin, if you come low you're just gonna get the skin you want
to feel some muscle that you're pushing on in there, and I can kind of feel it
tingle into my fingers. Not tingling like nerve pain, but where I'm hitting like a
pressure point and that's what you want to feel. and so again I'm pushing pretty
hard for that five to ten seconds. and I'm going to show you when I let it up
you can kind of see where my fingernail mark is right there. so you know that I'm
pushing pretty hard and again you can do both sides. you can do it a couple times
like if you want to do two or three on each side,
but I'd maybe alternate back and forth. and again you can see that I'm pushing
pretty hard. you can see where it gets a little bit lighter right there because
I'm pushing into that area and then releasing it. so again, a lot of times
even though I'm pushing here, if you have a headache those pressure points kind of
work out throughout your body, so it can help a referred area kind of thing. you
can also do a little pressure point it's called kind of your tendon triangle,
a little bit higher up at your thumb joint up top here. and for some people if
you can get it right, there's a tendon coming here and a tendon coming here and
sometimes there's a nice little groove or a pocket almost where those wrist
bones are. so you can use your thumb in between there or your finger, I kind of
like to use my thumb because I get a little bit more here, but again I'm
pushing right into that triangle around those tendons. so not necessarily on the
tendons, but in between in that pocket and again five to ten seconds holding it
switching sides getting that five to ten second hold and really just kind of
getting that pressure in there and getting everything to relax. and a lot of
times that's just helps relieve that anxiety helps relieve your,
if you're kind of stressed out because it almost kind of resets those muscles,
resets the whole meridian in your body. so then the next ones are for your
temple. so again this is another good one if maybe you have some tension headache,
or maybe at that dehydration headache you feel in the front. tension headaches
in the back or on the side, so just kind of finding your temples. you can do both
of these at the same time or if you just want to do one at a time you can, but
again with this one I like to use my fingers instead of pushing it with my
thumb's just cuz it's up on my temple area sometimes this is a little more
tender. but again I'm putting some pressure on there so I can feel that I'm
pushing. I'm not just placing my fingers there, I'm really kind of pushing in for
that five to ten seconds and really getting that push really getting that
feel, and you can do that a couple times if you want to. and then the last one is
another big one where you hold a lot of stress. you hold a lot of anxiety.
especially if you have a desk job, you work on the computer a lot, if you're
typing. back here is your levator scapulae muscle, and this is the one that
brings our scapula or shoulder blades up. and if you come down to where that
muscle attaches to that shoulder blade or that scapula, a lot of times you can
feel a knot. you can feel that pressure point and so sometimes this one again if
you're doing it to yourself, it's a little easier using your fingers but
maybe if somebody else is willing to do it for you, sometimes using the thumb or
even using the tool so you don't have to wear out your fingers. but I'm almost
just grabbing with my finger kind of going like this, you can see .and a lot of
times if you are stressed out or you've got a lot of you know tension in there,
you're gonna find it pretty easy. you're gonna oh that's the spot and then just
push inwards with those fingers. so again maybe that five to ten seconds. if a
therapist was doing it for you, when I'm working on patient, I usually hold it for
about sixty to ninety seconds. so I'm holding it a lot longer to try and get
those muscles to release, but sometimes it's a little harder to do on your own
and again if you're doing this for the first time, you might not want to go
quite that long because you're going to be sore afterwards. a lot of times when
you're getting those pressure points or those trigger points in there, after you push on it it gets really sore. but then the next
day it actually feels better because it almost reset everything. oh oh yes.
so there's your five stress relief pressure points. if you'd like to help
support my channel, make sure and click on the link up there, and don't forget to
subscribe, where Remy? down there. and remember be safe, have fun, and I hope you feel better soon.

How to Relieve Headaches u0026 Migraines | Reflexology

[Music] the reflex points we're gonna focus on for migraines and headaches are the reflexes to the brain head neck reflexes the spinal reflexes and then we'll end with the solar plexus so we'll begin using thumb and finger walking techniques and we'll start with the toe we'll work our way down so with the toe you always want to support the ball of the foot the whole top of the foot here and then you can finger or thumb walk down so supporting the toe in the back you can thumb walk down the toe you want to be extremely thorough if this is something that is important for your friend or family member that they're struggling with so you'll want a thumb walk down up across if you do it here it also lifts and go into a point a little bit more good go at a slight angle on your way up you can support and use your thumb and your finger and go down at the same time [Music] and you could use your finger walking on this part so again you're just coming down with the thing the finger walking right here you can give attention to the pituitary gland reflex you can give attention to these all these brain reflexes you could use a little bit of your knuckle at the top if you want to get in there a little deeper I don't use a lot of knuckle techniques I don't think they're necessary I think the thumb walking is very effective once you've done your whole toe the neck reflex is here the brain reflexes here coming down you'll want to do the spinal reflex so with a spinal reflex you're gonna come all the way from the top and do the entire spine so I'll start here always supporting and then I come down with some walking and I just move as I continue on and I'm taking really small bites here so you're not doing big sweeps you don't want to miss any area and you're going through different parts of the spine – you're going through at the very top here your cervical spine and your thoracic spine and your lumbar spine and these are the end points you're sending the message from this end point to the corresponding area to relax so you don't want to rush that just take your time so you'll want to be you want to do it bilaterally you'll want to do both feet in addition to that big toe you're going to want to do all the toes so with the neck reflexes here it's the same with the other toes you also have the sinuses that come down right here so you could with each toe just give a little bit of attention right there as well and of course at the very top we have the brain reflexes you give attention to all the toes both feet and then this spinal reflexes on the way down and then I always end with the solar plexus hold so you take your thumbs here this is the diaphragm line you're gonna come across here we're in the center there that's your point and you just lean forward [Music]

How to Relieve Sciatica | Reflexology

So we're going to start on this outer lateral
aspect of the foot. They sciatic nerve reflex will come down here. I'm just going to show you drawing the whole
line first. Pass through here, it'll continue on, on the
heel of the foot. And then it'll actually wrap around from the
heel of the foot. It'll actually then course up and then all
the way back up here. So you can see it's actually, the reflexes
are going all the way around and then back up again. Someone experiencing pain will actually often
experience a shooting down pain down the outer leg. Sometimes even in the inner leg. So you're going to want to use them walking. With them walking you're just using this joint
going down and back up a little bit. You're going to go in with constant pressure. Just lift up a little bit and then back in
again when you're doing the thumb walking. So we'll start here and we're going to do
it in one sweep. And we'll want to do that with both feet. So start here and you're just going to thumb
walk the sciatic nerve reflex. It can be very intense if somebody either
has a problem in that area or even someone that has tightness in their hips. So you can see now we're coming down here. We're about to wrap around to the heel. So you go through the heel reflex. You're going to pass through now on the inner
side. And from the inner side you can use finger
walking. And I'll show you on the other foot too so
you can see it from that angle. But I'm just continuing and finishing up there. Now we'll do it on the other foot. So on this side we'll be here. So you could actually start this way too. Either side, it doesn't matter. You come down through here. It could be really tender so check in with
your person. And if there is an area of tension just kind
of lighten up your pressure. You could even stop there for a moment and
just hold and then move on. And I always like to, especially when doing
a protocol for a certain area of the body, while we just did the sciatic nerve reflex,
I'll also want to give attention to the lymphatic groin or Fallopian tube reflex for her across
here using finger walking techniques. Do one at a time or both at a time. Sometimes it's a little bit easier if you
come from the medial aspect inside and then come out. I'm using my middle finger here. And of course supporting the foot with my
other hand and my thumb. I'll always give a little extra attention
to the lower back and here on both sides. And then I'll end with a little bit of angle
traction. When ending any protocol it's nice to end
with that solar plexus hold. That's coming up through here right below
the ball of the foot, about midway through, your thumbs press in. Right. Center there, and then you just lean forward
a bit. And that'll be your protocol for relief for
sciatica using reflexology.